Raspberry Pi IOT Air Conditioner
June 20, 2018
Why #
The heating and cooling system in my house works well everywhere except my bedroom. In the summer the temperature can reach over 100°F and in the winter it can drop below 50°F. In an effort to make it more bearable, we picked up an LG LP1415SHR air conditioner, and man did it work. There was, of course, one major problem: I couldn’t control it from the comfort of my bed!
This model does come with a remote however it always existed in one of three useless states: out of reach, not charged, or simply missing altogether. Even when I had the remote, the infrared signal didn’t reliably reach and so I had to drag myself out of bed to mess with it. Worst of all, I couldn’t yell at any of my smart home devices to control it! Simply unacceptable!
The project #
All jokes aside, I wanted a way to control my AC unit over the internet using a Raspberry Pi. Once it’s on the internet, I could do just about anything I wanted—from integration with my Echos to smart scheduling— in a way I was comfortable with.
Parts list #
- Raspberry Pi (whatever version, will not be stressing the processor too much)
- An infrared emitter/receiver
- An air conditioner and an infrared remote (in my case the LP1415SHR)
- A temperature sensor (optional, but makes the system “smarter”)
Assembly #
There really isn’t much in the way of wiring here.
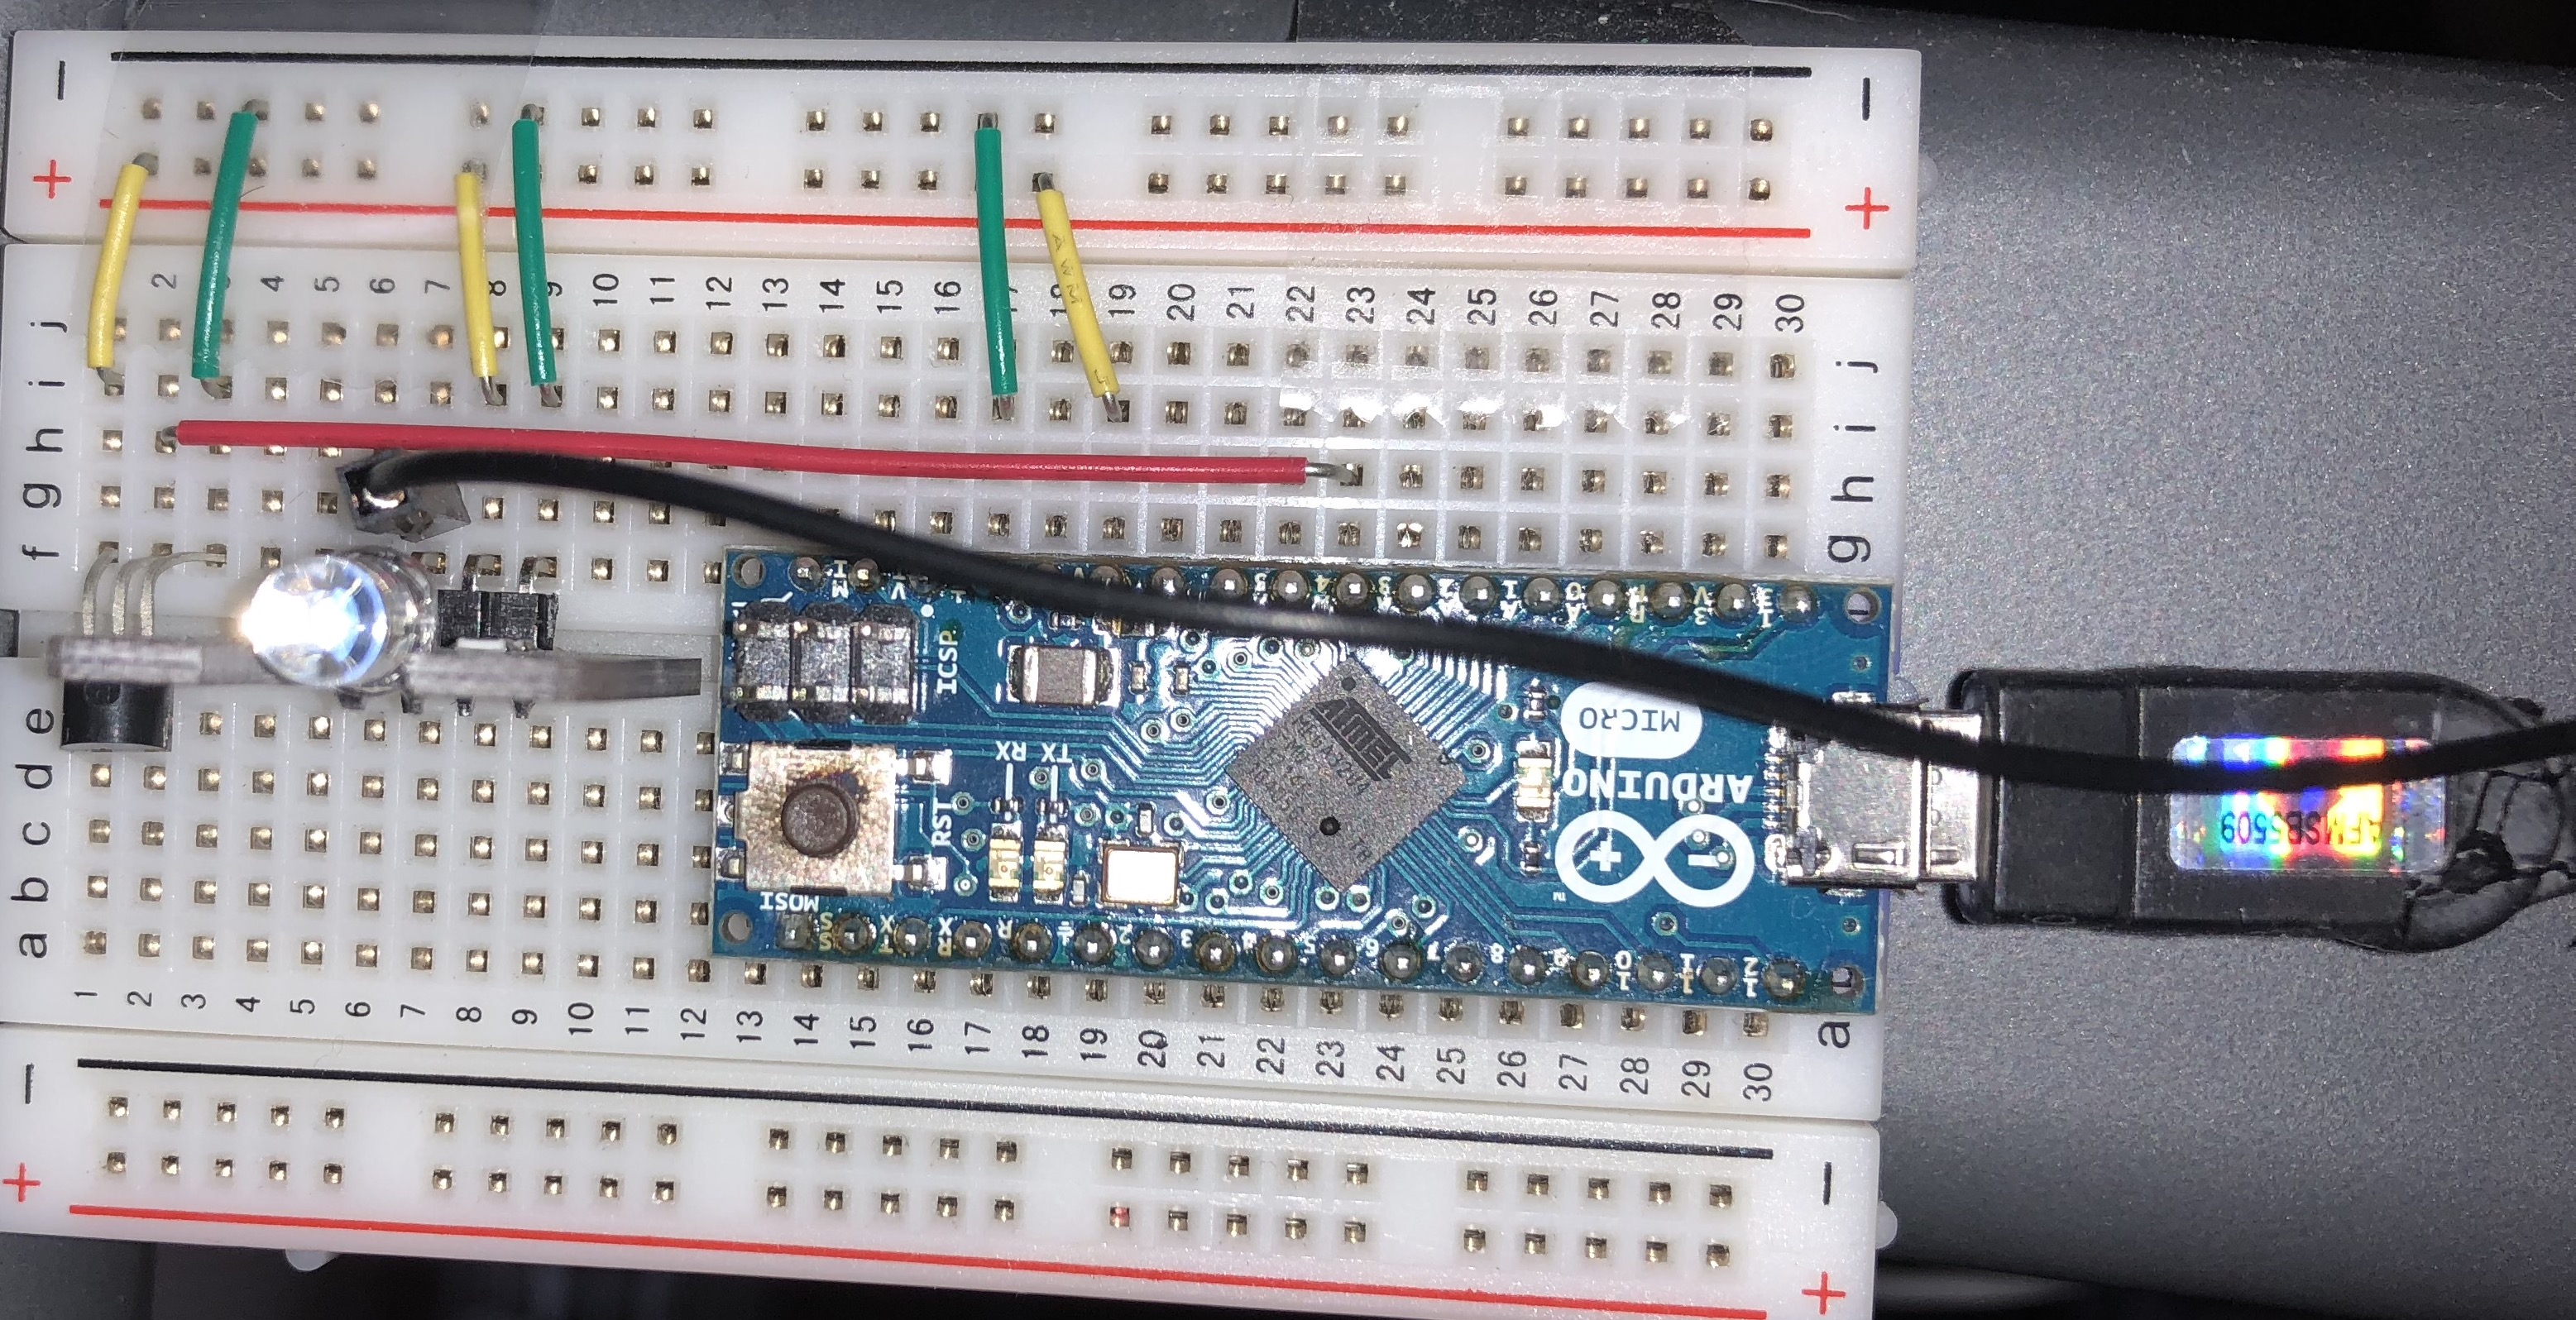
Connect the infrared emitter and receiver (not pictured) to power and a free pin on the Raspberry Pi. Remember (or write down) the pin number. I also make use of an Arduino micro here because I only have an analog TMP35 sensor on hand and so if you don’t use/have a digital sensor you won’t need it. You can likely skip the breadboard all together and just attach the emitter with a long wire so long as you don’t have any extra sensors.
Once everything is in place, mount the board somewhere with direct line of sight to the IR receiver on the AC unit. If possible, ensure that neither the emitter or receiver are in direct sunlight.
Programming the remote (LIRC) #
The easiest way to control IR LEDs on Linux is to use lirc. To install it you can follow these instructions here.
I searched around for a while for LIRC remote files for this air conditioner but didn’t find anything and so I had to create my own. This proved difficult, however, because the remote protocol for this air conditioner is very large. Instead of operating like a standard TV remote which just sends a volume up command (around ten pulses usually), my remote sends the entire configuration on every button press (147 pulses). This meant that every time I raised the temperature, the remote also transmitted the fan speed, swing state, mode, auto clean state, and probably even more options that I don’t know about.
I couldn’t, therefore, use irrecord (a LIRC tool which can be used to record IR commands) so I instead had to craft my configuration by hand. The config file itself is very picky about whitespace so I recommend you simply download the example at the end, however you can record long codes by doing the following:
- Configure the remote control to the settings you want
- Turn the remote off
- Run
mode2 -m -d /dev/lirc0 - Point the remote at your receiver, and then turn the remote on
At this point you should have a large block of numbers which you can copy into the configuration (in the same format as the others).
To setup the configuration I provide: download and save it at /etc/lirc/lircd.conf, run service lircd restart and then service lircd status to make sure everything loaded correctly.
The provided config has the following commands already:
- ON_COOL_F3_65_CLEAN
- ON_COOL_F3_70_CLEAN
- ON_COOL_F2_70_CLEAN
- ON_COOL_F1_70_CLEAN
- ON_COOL_F1_70
- POWER_OFF
- ON_HEAT_F1_74_CLEAN
- ON_HEAT_F2_74_CLEAN
- ON_HEAT_F3_74_CLEAN
These will be available in the configuration file linked at the end however if you need more you can easily add them.
Once you have installed the configuration correctly and reloaded lirc, you can execute any of these by simply running irsend SEND_ONCE LG_AC <THE_COMMAND_YOU_WANT>. If all goes well you should be able to turn on and off your air conditioner as well as set the temperature and fan speed.
At this point, you should be able to control your unit from the comfort of the linux shell. While I do live at my desk, I think we can all agree that sshing into a Pi is not the most convenient way to turn on the heat.
Putting it on the internet #
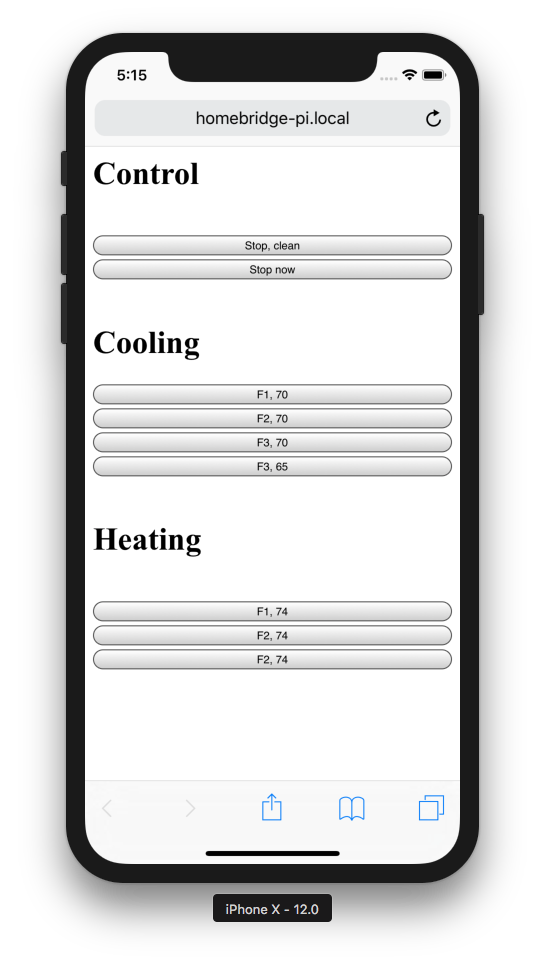
Now for the fun part! I tossed together a quick python web server which, while not beautiful in the least, gives access to all the controls I need. The code for the web app will be included as well, ripe for the tweaking.
The API is quite simple, just send a GET request to http://<web_server>:<port>/<REMOTE_CONTROL_COMMAND. Command names are case sensitive so be sure to use the exact command name as is in lircd.conf. The server will always respond with “OK” (whether or not the command had an effect) to let the caller know the command was received and processed.
As a note, the API is totally unsecured by default. There are no tokens, passwords, or keys restricting API usage nor does it support TLS. I set out to create an IOT device and truly did, didn’t I?
Jokes aside, I intend for you to implement authentication and encryption on the network border, such as with a reverse proxy. In my case I have an nginx reverse proxy which handles TLS and provides authentication through a username and password for all of my sites. Linode’s guide on this is a great resource for setting this up.
Extensions #
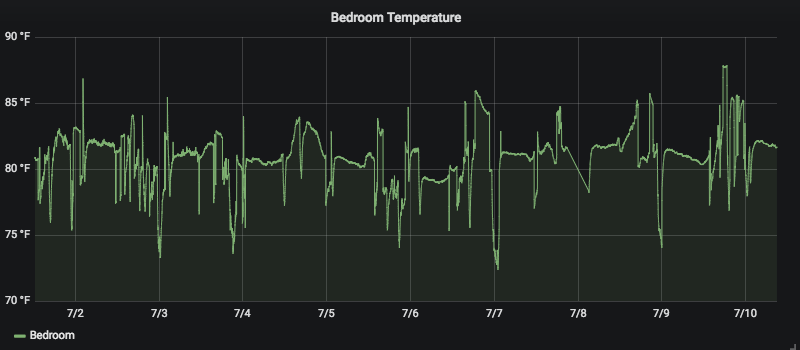
I took this project a bit further and integrated it with my Grafana instance so I can see historical, minute by minute temperatures of my bedroom right alongside many of my other metrics. This will (unfortunately) be left as an exercise to the reader as there is a lot of setup, however I do encourage the savvy to check it out because the data is very useful.